Make Homemade Vinegar With (almost) Anything
How is vinegar made? Can I make my own from scratch? Yes you can and here is a simple method for you to start making your own today.
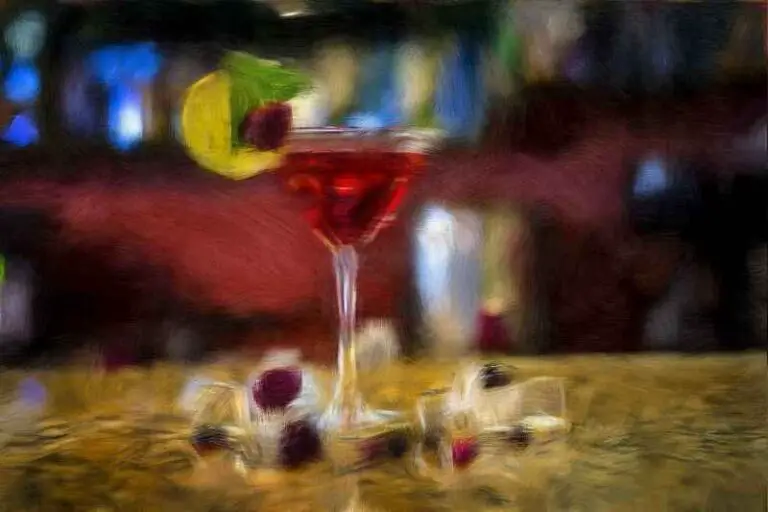
One of my favourite fermenting projects is making my own vinegar.
Whether it’s proper fruit vinegar, fruit scrap vinegar or other more exotic types I always have some brewing in a corner of my kitchen.
And the reason for it is that I love all the different flavours I can create (then combine) and I also love that I am able to use leftovers before adding them to the compost pile.
It is at once surprising and fascinating to realise just how many fruits and vegetables one can make vinegar from.
Especially considering how the majority of us have been brought up knowing two, maybe three, varieties at the most.
I for one have lived off Balsamic vinegar, white wine vinegar and sometimes apple cider vinegar.
That’s it; all the others were not even in the equation.
So a whole new world opened up for me when I understood how “stuff is done” and I have begun fermenting my own.
I hope an equally wide world will open for you once you see how ridiculously simple is to make vinegar with pretty much everything you can think of.
Let’s begin
How To Make Vinegar From Scratch
To be very general and very basic we can say that vinegar is the product of a sugary solution after yeasts and acetic acid bacteria have fermented it.
We can also say that in the vast majority of cases the sugary solution we just mentioned is raw fruit juice or raw vegetables juice.
Quick note
I know that many websites teach people to make vinegar ONLY with fruit scraps but, even though possible, the end product is NOT what we commonly intend as vinegar.
Without going into details, what you’ll get from such scraps is fruit scrap vinegar ( FSV ) which is a mildly acidic fruit flavoured vinegar and not real vinegar.
In case of apples you will NOT obtain apple cider vinegar ( ACV ) but apple scrap vinegar ( ASV ) instead.
The two should not be confused.
End of the quick note
The freshly squeezed juice has to go through two stages of fermentation and, when those are completed, what you have is vinegar.
Very simple, very easy.
To sum it up, the key components of homemade vinegar are:
- Sugary solution
- Yeasts
- Acetic acid bacteria
Thanks to these 3 components you can make vinegar without alcohol, meaning you can make vinegar even if you don’t have wine or beer as your starting product.
Home Made Fruit Vinegar
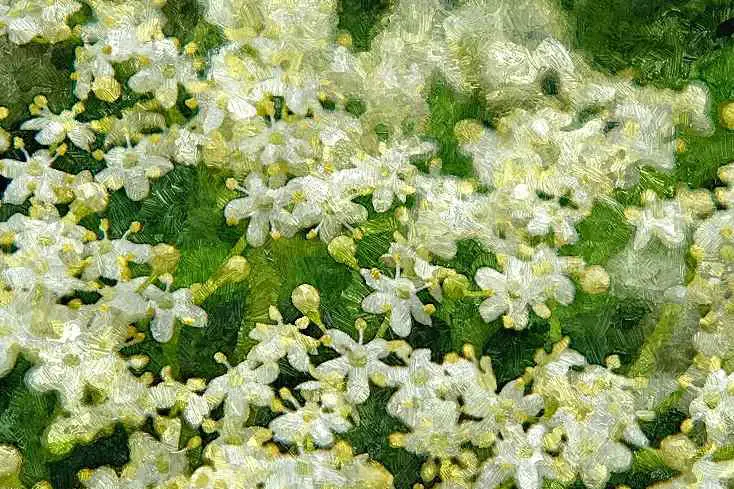
As mentioned above the sugary solution is almost always fruit or vegetable juice.
Any fruit juice really, plus a surprisingly interesting variety of vegetable juices: like carrot, beetroot and pumpkin to name a few.
One of the most widely used “sugary solution” is by far apple juice; the juice that people all over the world transform into the very well known apple cider vinegar (acv)
Did you notice that the name is apple CIDER vinegar and not apple JUICE vinegar?
Here is where the yeasts come into play.
But before I proceed with telling you more about yeasts and acetic acid bacteria let me spend a few important words on sugar.
The Sugar In The Sugary Solution
It is time we reconcile with the fact that not all fruit juices were created equal and that some of them have a much higher sugar content than others.
Ripe grapes naturally contain a lot of sugar, apples not as much and plums even less.
So while we can make an incredibly good vinegar out of plain grape juice, because it naturally produces a high alcohol by volume wine, we can’t say the same for other fruits.
Some like bananas or persimmons have a high sugar content but hardly any juice, some others like blackberries or plums are very juicy but are naturally less sweet.
In both cases mentioned above we have to manually intervene to bring our solution to the desired liquidity and sweetness.
If we were to work with persimmons or bananas we will definitely need to blend the whole fruit with water or add some to the extracted juice.
We will then asses the sugar level of the solution with a hydrometer or, better, a refractometer, and add more sugar if necessary.
With very juicy but not so sweet fruits we will check the sugar level of the pure juice to see if more is needed.
Like in the case of apples for example.
They usually are sugary enough to produce a nice acidic apple vinegar but sometimes an extra boost is needed.
Remember: not enough sugar equals not enough alcohol which translates into a vinegar with not enough acidity.
Choose The Right Sugar
The right sugar for what exactly you might ask?
To properly feed your yeasts and to add flavour to the homemade vinegar.
You have probably noticed that many of the recipes found online make use of white refined sugar and it is fine.
If that concerns you know that at the end of the process there will be virtually none left.
White refined sugar is sucrose in its purest form and is a great boost for yeasts to grow, colonise the brew and proliferate.
But it’s also true that the friendly critters benefit from some extra nutrients, such as minerals and vitamins, found in less refined sugars like piloncillo or rapadura.
That’s why it is my personal preference to use them in combination.
Sugars can also be used as a flavouring and colouring agent where white sugar won’t affect either colour or taste whilst darker ones will.
Panela, piloncillo, rapadura, muscovado, demerara, all will add colour and flavour to your homemade vinegar so use them to your advantage.
The Yeasts
Yeasts are little fungi with the special ability of turning sugar into alcohol; all while excreting CO2.
So they will take your raw fruit juice, apple juice in our example, eat as much sugar as they can and transform it into a more or less alcoholic solution known as fruit beer or fruit wine.
In the case of apple juice the friendly yeasts will take fructose ( plus sucrose and glucose ), transform as much of it as they can into alcohol and deliver to you the very known and appreciated apple cider.
Or hard cider or apple wine, whichever name you are familiar with.
So if we look again at the name apple cider vinegar we understand that it is from the alcoholic cider that vinegar is made.
Meaning: the fermentation stage performed by yeasts is a fundamental step of the entire process.
The Acetic Acid Bacteria ( AAB )
As the name ACETIC ACID bacteria suggests, these little critters are the ones in charge of souring the fruit wine and turn it into fruit vinegar.
How do they do that?
They have the ability to transmute alcohol into acetic acid and therefore to turn an alcoholic liquid into vinegar.
In the case of apple cider vinegar they are the ones responsible for adding the final word “vinegar” to “apple cider”
See it this way:
Apple = Fruit (juice) -> Cider = Alcohol -> Vinegar = Acidity (acetic acid)
or
SUGAR -> ALCOHOL -> ACETIC ACID
Where To Source Yeasts
Well, yeasts are everywhere so they are not at all hard to find, but our goal is to only work with yeasts that will leave a pleasant flavour in the brew.
We certainly don’t want those that smell like cheese or unwashed socks.
Believe me they exist, and they always seem to find their way to places where they should not be!
Back to the good tasting yeasts.
There are 3 main ways to procure yeast
- catching them from the air
- using a homemade starter
- using commercial yeasts
Fishing yeasts from the air is utterly simple ( you just need to leave your jar open… ) but quite risky in terms of flavour.
That’s why I don’t use this system and I always opt for preparing a starter.
Which is too very very simple.
All you need to do is squeeze some juice from the fruit you are going to use and let it ferment in a sealed jar for a few days.
Leaving enough head space, shaking every day and releasing CO2 periodically are always a must btw.
When you see bubbling or froth fermentation is ongoing; wait two or three days and give your starter a taste.
Is it good?
GREAT; you have just made your starter.
Is it bad?
Try again; second time lucky.
In the example of our apple cider vinegar you would squeeze 1 or 2 apples and pour the juice in a jar at room temperature for a few days.
Buying commercial yeast is probably the least hands on approach and also the safest when it comes to taste; after all they have been selected for that.
If you are uncertain about which ones to choose, champagne yeasts are usually a good option.
Where To Source Acetic Acid Bacteria
This one is easy.
From the air all around you.
Or from the fruit flies that will accidentally fall into your brew, as they are natural carrier of acetic acid bacteria.
As always, Nature is perfect.
The Two Phases Of Fermentation
RIGHT; now that we know what the components are and how to source them, let’s dive a little into the two phases of fermentation necessary to produce homemade vinegar.
PHASE ONE – From Sugar To Alcohol
We already know that we need a sugary solution, namely fruit or vegetable juice, and yeasts in order to create alcohol.
But how do we actually do that?
Very very simply.
We pour the fruit juice into a container, add the starter or the commercial yeast, seal it with an airlock and wait.
That’s it
After all it’s always the critters doing all the heavy lifting for us.
Remember: sugar to alcohol fermentation is anaerobic, meaning it occurs when oxygen is NOT present.
As mentioned before sometimes it’s necessary to increase the sucrose content of the starting liquid by adding some sugar.
This is because we need to produce a wine or beer or cider with a high enough alcohol by volume ( abv ) before transforming into vinegar.
A minimum of 8-9% is required if we desire to obtain a strong vinegar with a good level of acidity.
Don’t worry, if your brew does not reach that alcohol level is not at all the end of the world.
You will simply have a more delicate homemade vinegar that you can still use in hundreds of different ways in food, around the house and even in the garden.
PHASE TWO – From Alcohol To Acetic Acid
Once the yeasts have fermented all the sugars we are ready to move to phase two, which is even easier than phase one to be honest.
Ready?
All you need to do is to remove the airlock, unseal the ( now ) beer / wine / cider and cover it with a cloth or a piece of paper towel.
That’s it. Done.
The AAB ( acetic acid bacteria ) will do the rest.
Remember: acetic fermentation is aerobic, meaning it requires oxygen to occur.
Now that we got a lot of theory out of the way the time to make some vinegar has finally come.
Join Our Community
Choose The Right Fruit Or Vegetable
Just like in any other fermentation project, when we make fruit vinegar we need to choose the best produce for the goal.
Fruit and vegetables should be ripe, even overripe, but obviously not gone down rotting road.
If they have bruises or cuts or imperfections cut them off completely and deeply and you’ll be fine.
After all bruised fruit fallen from trees has been traditionally used in vinegar making for millennia.
Furthermore, if what you use is organic or non sprayed you don’t need to remove rinds and peels; but I would advise against doing so if you were to use chemically treated produce.
Indeed making vinegar is a wonderful way to reduce waste and find a use for B grade fruits and vegetables that would just be otherwise thrown in the garbage.
Home Made Fruit Vinegar Recipe
Vinegar making can be complex and very technical; if you have ever seen how real balsamic vinegar is made you know what I am talking about.
It takes years of practice, continuous checking and an ongoing effort in keeping the balance that even involves hiring qualified professionals.
The recipe I am about to share with you is intentionally simple and uncomplicated so that each and everyone of you can start immediately.
It is therefore aimed at beginners and at those of you who want to experiment with homemade vinegar in a very accessible way.
Here we go.
It is a general recipe, or process if you wish, that you can apply to any fruit or vegetable you desire.
In this example we are going to make apple cider vinegar ( ACV ) together.
Remember: you ALWAYS need the THREE COMPONENTS sugar, alcohol, acetic acid.
INGREDIENTS
- Apples
- Sugar of your choice
- Salt
STEPS
FOR THE STARTER
→ Follow these steps ONLY if you intend to make your own starter; if you want to wild ferment or are going to use commercial yeast skip them.
- Juice 1-2 apples
- Place juice in a jar and seal it
- Shake it every day for 3-4 days
When you see activity ( bubbles or froth ) in the starter it means that yeasts have begun to reproduce and fermentation is ongoing so it’s time to taste it.
FOR THE VINEGAR
- Juice all the apples you intend to use
- Pour the apple juice into a big bowl
- Add 1 heaping tablespoon of sugar for every litre ( 1 quart ) of juice
- Stir well
- Add 1-2 pinches of salt and stir
- ( Add the commercial yeast or the starter you have prepared )
- Pour all the juice into the chosen container
- Seal with an airlock
- Let it ferment until you see no more bubbles in the airlock
- Remove lid and airlock
- Substitute with a cloth or a piece of paper towel
- Let it ferment for 3 weeks before tasting
- When the brew has reached the desired level of acidity vinegar is ready
TIPS
Both fermentation phases should be conducted at fairly warm temperatures of at least 22° C ( 72° F ) and higher.
During the acetic fermentation ( aerobic ) it is advisable to periodically stir the liquid in order to incorporate more oxygen and facilitate the process.
If you have raw apple cider vinegar handy you could add it to the container when you uncover it at the end of the first fermentation.
By doing so you will be introducing living acetic acid bacteria to the brew therefore fast tracking the acetic fermentation.
This technique is called backslopping and it’s widely applied by home fermenters all over the world.
Obviously you can use any raw vinegar not just apple cider vinegar
If the container you used for the first fermentation has a small mouth it can be useful to transfer the alcoholic liquid into a wide mouth one like a demijhon.
It will help exposing more of your brew surface to oxygen.
QUESTIONS AND ANSWERS
Do I Need The Mother Of Vinegar (MOV) To Make My Own Vinegar?
No you don’t.
As you have read above you can make homemade vinegar without it, but if you have it, or if your vinegar happens to produce one, keep it.
Thanks to it you will fast track the second phase of fermentation and have a constant supply of your favourite fruit vinegar.
How To Make Vinegar From WINE
The process is probably the simplest of them all.
Has it ever happened to you that some of your favourite wine left opened began to smell like vinegar?
Wine has already completed the first phase of fermentation when sugars are transformed into alcohol so it only requires phase two to become vinegar.
Just pour the wine ( red or white ) in an open container and let the acetic acid bacteria perform their magic.
Here a couple of tips for you.
Tip 1
If you intend to use a high abv wine equal or above 12% you will have to dilute it with water, else the acetic bacteria will die without being able to turn it into vinegar.
You can add a cup of water for every litre ( quart ) of wine.
Tip 2
Nowadays wine, especially cheaper wine, is full of sulphites whose exact job is to prevent wine from spoiling, aka turning into vinegar.
So you either choose a fairly “natural” old school wine or you will have to intervene to reduce the amount of preservatives.
One way to do that is adding hydrogen peroxide in the amount of 3% of the wine volume.
Which is roughly 30ml of hydrogen peroxide for every litre ( quart ) of wine
How To Make Vinegar From BEER
How do you make vinegar from beer?
Exactly like you make it from wine.
Pour beer in an open container and let it turn into vinegar.
Patience is all it’s required on your part.
Make Vinegar From STORE BOUGHT FRUIT JUICE
Obviously yes and if you are impatient to start you can follow our watermelon vinegar recipe which is very easy.
BUT if by fruit juice you intend store bought, then there are a few more things that need to be said.
Generally speaking nature would horrify at what supermarkets and brands today call “fruit juice”.
Water with trace amounts of fruit and a lot of colours, chemicals and preservatives.
Well, making vinegar out of that can be quite a task, even though not impossible, and I personally would not attempt it.
Also because I suspect the final product and its taste would be very average.
What you can do though is purchasing better quality fruit juice and proceed exactly as outlined in our recipe above.
Can I Use Home Made Vinegar For Pickling Or Preserving?
NOPE.
Homemade vinegar of any origins, fruits, vegetables or wine that is, hardly ever reaches the level of acidity necessary to safely preserve food.
The chances of seeing food spoiling, unwanted guests like mould and even botulism are way too high to be worth risking.
I therefore strongly advise against using homemade vinegar either for canning or preserving or pickling.
Cloudy Vinegar
Many people become very concerned when they see their home made vinegar turning cloudy.
But fear not!
Everything is exactly how it is supposed to be: your vinegar is raw, unpasteurised, unfiltered and ALIVE!
Your body and your intestines will benefit from it.
So here you have it.
I hope that after reading this you will begin your homemade vinegar adventure as soon as possible and discover first hand what a wonderful world it is.
Start small, even with just one little jar but start.
You will be thankful you did.
To your vinegar journey.
See you soon.