Homemade MILK KEFIR – Kefir Grains And Milk Is All You Need
No need to buy Kefir yogurt from the store: you can start making your own milk kefir right now with just MILK and KEFIR GRAINS. Learn how.
If you have never heard the name Milk Kefir before and have no idea what it is, here is a quick recap for you.
Milk kefir, often referred to as kefir yogurt, is a dairy based fermented drink rich in probiotics, vitamins, minerals and with many documented health benefits.
Improved digestion, increased immune function and the ability to reduce the overall inflammation of the body are just some of them.
On top of that, it tastes great on its own, in many different desserts and cakes and, drum roll, in fermented cocktails!
Did you just make milk kefir and have an excess of whey? Awesome! Use it to make BLAAND and feel like a real viking!
Are you looking for a non dairy milk kefir instead? You can find the recipe here.
Where does milk kefir come from?
It originated in the Caucasus Mountains where goat shepherds used to place the raw milk inside a container made with a goat stomach and let it ferment for a day or so.
Since its origins, centuries ago, it has been continuously made and consumed both as a highly nutritional food and a very effective medicine.
And even to this day in many areas of Eastern Europe and Russia it is used as a therapy in hospitals.
With time not much has changed in the production of home made kefir, except that now we use a more stable inoculant and ferment it in food safe containers.
Milk kefir is made by adding kefir grains ( kefirans ) to a chosen animal milk and the two are let to ferment for 24-48 hours, usually at room temperature.
The finished product is a slightly sour, effervescent drink ( or food ) that resembles yogurt and is packed with nutrients.
And by now I am sure you guessed that to make milk kefir one ONLY needs two ingredients: kefir grains and animal milk
So let’s familiarise with the first one.
The grains
What Are Kefir Grains?
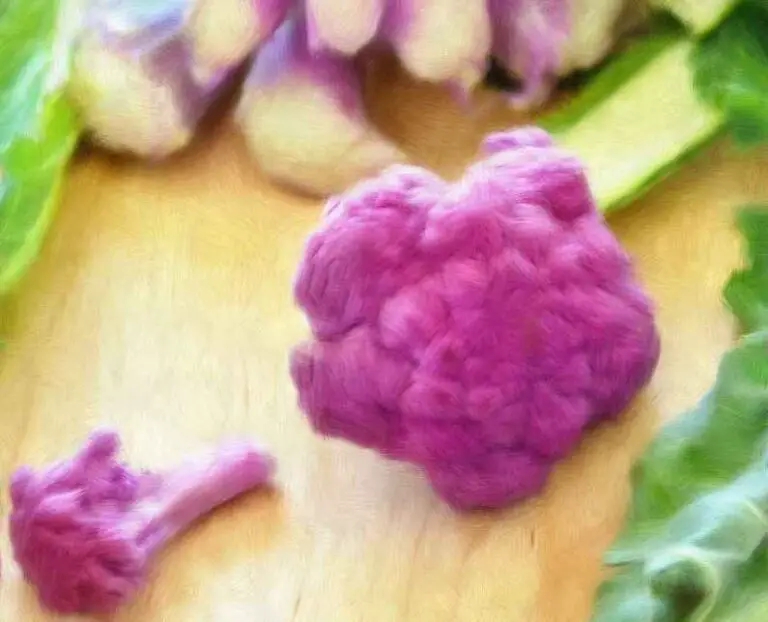
If you have never seen one, the best way to picture them is to think about cauliflower florets as they really look a lot alike.
Furthermore, contrary to what many believe, the white grains we see and touch are NOT the microorganisms, they are their houses.
Some are tiny houses, some villas, others are apartment blocks and some are even comparable to skyscrapers.
In addition, what we call “grains” in a quite simplistic way, are indeed a symbiotic colony of bacteria and yeasts (SCOBY).
Such colonies, or ecosystems if you will, and their interactions are SO COMPLEX that even nowadays no scientific laboratory has been able to recreate them from scratch.
Fascinating, isn’t t?
Both yeasts and bacteria -lactic acid bacteria- perform specific functions during the fermentation process and are absolutely necessary for the fermentation to occur as it is supposed to.
The yeasts, for example, are responsible for breaking down the lactose and for producing both lactic acid and carbon dioxide gas.
Such by-products are what gives kefir its characteristic tangy taste.
In turn, the lactic acid bacteria produce enzymes that break down milk proteins, making the end product much easier to digest.
So, after stating the above, I’d like to make something really clear.
It does not matter what bloggers tell you or what you read on social media: to make proper milk kefir YOU NEED kefir grains (kefirans).
Period.
And I am sure you now understand why.
It is also important to understand that kefirans ( kefir grains ) are completely different from tibicos ( water kefir grains ).
Their composition is different, what they need to survive is different, what they produce is different and they can never be swapped.
In other words: you CANNOT use kefirans in place of tibicos and vice versa.
Keep The Grains Healthy
It goes without saying that kefirans need to be cared for and stored appropriately in order to keep colony balanced.
The risk of not doing so, is seeing one group of microorganisms overtake the others, causing the end product to be inferior in quality and, more importantly, less beneficial.
So how do we make sure to keep our grains happy?
Number one: we always keep them at the right temperature.
Ideally between 15° – 22° C ( 59° – 71° F ).
With lower temperatures the yeast activity will decrease and with higher ones it will accelerates; both scenarios bring imbalance to the colony.
Number two: if we go away for some time we store them in the freezer.
Scientific studies have proven that kefir grains stored at very low temperatures not only survive but perform really well once reactivated.
To store them in the freezer simply place them in a plastic container or a freeze bag together with some good quality milk.
Number three: we do not wash them with water.
Grains do not need to be cleaned or rinsed before adding new milk.
Number four: we only and always use animal milk.
Once again, don’t mind what you read online and don’t listen to your neighbour whilst laughing tells you she has used coconut milk for years.
Milk kefir NEEDS lactose.
And where do you find lactose?
That’s right; in animal milk.
Number five: we don’t exaggerate with cream.
If you happen to milk your own cow it’s possible you have an amazingly delicious milk with a ton of cream.
I know you and I both love it, but kefir grains don’t and too much cream can really “suffocate” them and, ultimately, kill them.
That’s why my advice is to remove the excess cream from the milk, ferment it and add it back, if necessary, once the kefirans have been removed.
And now that you know how to care for them, let’s see where you can find some.
Where To Find The Grains
If you have read along, you already know that milk kefir grains cannot be made from scratch.
We, for example, have bought ours on Amazon and they have been making an exceptional kefir for over a year.
But the most common, and many say more “true”, way of sourcing the grains is by finding a person willing to share some with you.
Don’t worry, it’s very very easy.
If you are a Facebook user just do a quick search and you will find plenty of milk kefir related groups that have updated lists of members that do just that.
If there are no donors in your area, don’t despair.
Go to your food coop, local market, farmers market and ask around; I assure you you’ll find someone very happy to share some of their grains with you.
So now that we understood better what the grains are, where to source them and how to properly care for them let’s talk about ingredient number two.
The milk
Choose The Best Milk To Make The Best Kefir
There are several types of milk that can be used to make milk kefir, with the most common being cow’s and goat’s.
Choosing one usually comes down to availability and personal preference; I, for example, really dislike goat’s milk and so does my wife.
Hence the choice for us is pretty simple.
If you opt for cow milk your first best choice would be non homogenised whole milk, which is the most untouched after raw milk.
I have used raw milk in many circumstances because I feel comfortable doing so, but, unless your medical practitioner has given you the green light, I would advise against using it.
Whole milk is safe to consume and delivers a milk kefir that is rich in fats, creamy, full of minerals and really really delicious.
To put it very simply: the better the milk you choose, like organic grass fed for example, the better the end product will be.
If your preference is for goat milk, like the original recipe from Eastern Europe, know that the suggestions are pretty much the same.
Obviously goat’s milk kefir will be less creamy and less fat rich, considering that goat’s milk has a lower fat content compared to cow’s.
But if you like the taste of this type of milk you will love the milk kefir it produces.
One very important recommendation.
Amongst all the different types of animal milk you can choose from there is only one you really need to avoid: lactose free milk.
Unless you want to starve and kill your kefirans, of course.
Lactose free milk plus added sugar won’t work either because, as mentioned above, your grains feed off lactose, not glucose.
And finally we are ready to see how to make a perfect milk kefir at home.
How To Prepare Milk Kefir
Assuming you have read the previous ( important ) points of this tutorial, you should know by now that to make milk kefir in the comfort of your kitchen you only need two ingredients.
No need to add sugar, honey or anything else.
So here we go.
Milk Kefir Recipe – STEP BY STEP
EQUIPMENT
- Glass jar with wide mouth
- Lid
- Spatula
- Plastic Colander
INGREDIENTS
- Dairy milk
- Kefir grains – kefirans
STEPS
- Place the grains inside the clean jar
- Pour the desired amount of milk over them
- Put the lid on very loosely
- Place the jar NOT in direct sunlight
- Allow to ferment for 24 hours
- Strain kefir through the colander
- With the spatula “stir” the grains to allow the creamy part to filter through
- Place the grains back in the jar
- Start the fermentation process all over again for the next batch
SOOOOO EASY right?
Just by following these simple steps you will enjoy a perpetual supply of milk kefir.
And the best part is that you will be investing no more than 10 minutes of your time, because microorganisms will basically do all the work for you.
TIPS & TRICKS
Once the 24 hours have passed milk has fermented and milk kefir is ready to drink as is, in a smoothie, a smoothie bowl and in any other way you desire.
BUT if you wanted to do a second fermentation, even just because you made too much kefir to eat in one day, know that you can do so.
Simply remove the grains like you normally would, consume the amount you desire, pour the rest in a jar and place it inside the refrigerator.
Just an FYI.
By putting kefir through a second fermentation you will increase its folic acid content but also partially lower the overall amount of vitamin B.
How To Know When Milk Kefir Is Ready
Often, especially at the beginning, people are worried they won’t understand when the milk has properly fermented and kefir is actually ready to eat.
It is way simpler than what you might think.
If you follow the 24 hour time frame, keep the jar at the right temperature and use the correct grains-to-milk ratio ( more on that later ), you have 95% chances to have made a delicious kefir.
In addition to that I always recommend taking advantage of your very own features called smell and sight.
If, for example, you see a transparent liquid at the bottom of the jar separated from the white creamy part at the top, it is a clear sign that your milk kefir has over fermented.
And there is absolutely nothing to worry about.
It just means that this time you’ll eat a quite sour milk kefir and for the next batch you will have to either reduce the percentage of grains or increase the amount of milk.
Let’s say instead that you opened the jar and were hit by an unpleasant cheesy and slightly off smell.
That is a red flag telling you that your milk kefir is best to be given to your plants or delivered right down the drain to clean some pipes.
It is a quite rare occurrence though.
Something that might be helpful to you in order to decide whether the kefir is ready to eat or not, is having an idea how it should taste.
The Taste
Whilst it’s difficult to describe milk kefir taste to someone who has never tried it, I think the following could help .
If you have ever eaten plain white yogurt WITHOUT added sugars or flavours you already have a quite good reference in your taste archive.
In reality, spoken by someone who has eaten buckets of white natural yogurt, milk kefir has a much more complex and layered flavour than any given yogurt.
And this is why.
Yogurt contains two, three different types of microorganisms while milk kefir can contain up to thirty or more.
This is also one of the reasons behind its many beneficial effects on the body.
Another difference between yogurt and milk kefir is that the first can last a couple weeks or longer in the fridge ( at least the store bought yogurt does ) while the latter will be good for 3-4 days maximum.
IMPORTANT: If you decide to flavour kefir with fruits and such, its shelf life could be shortened; so be mindful of that.
This is why in our kitchen we always add flavours right before consuming our kefir to avoid any possible spoilage.
But you are obviously free to do what works best for you.
Whilst we are on the subject let me also suggest to ALWAYS add flavours, whether it’s fruit, fruit juice, extracts, powder supplements and so on, AFTER the fermentation is completed and kefirans have been removed.
Last but not least let’s talk about the right grain to milk ratio to make an excellent milk kefir.
Grains To Milk Ratio
As you might have guessed the ratio of kefir grains to milk is as much an important variable as temperature, quality of milk and length of fermentation.
Furthermore, temperature, length of fermentation and amount of grains used are inextricably combined, so much so that we cannot change one variable without needing to adjust the others.
To make it simple.
Let’s take 20° C ( 68° F ) as our reference temperature being it very ideal to properly ferment kefir.
At that temperature we ferment for 24 hours.
But how many grains do we need to carry on the fermentation correctly?
Roughly 10% of the weight of the milk you are using, which translates into 100 grams of kefirans for every litre of milk.
And if your kitchen is colder?
Assuming you still want to ferment for 24 hours all you need to do is to increase the amount of grains you use.
Personally, even in a fairly cold room ( 15° C / 59° F ), I have never needed to use more than 20% of the weight in grains, but it’s possible that in your case you will need more.
Conversely, if your kitchen is warmer, you will reduce the amount of kefirans used.
Now that it’s summer where we live, we use no more than 5% of grains by weight and often ferment our kefir inside a cooler together with an ice block.
But it gets hot here and temperatures inside the house easily reach 26-28° C ( 78-82° F ).
And as we are talking about the proper grain ratio I will also quickly address the elephant in the room.
The question that, although partially answered throughout the tutorial, many of you would still like to ask.
Can I make milk kefir without grains?
The very very short answer is no.
You simply can’t put a jar of milk in a warmish room and magically have milk kefir 24 hours later.
Yes, milk will ferment ( ever heard of clabbered milk? ) but that’s another story…
So you need grains to produce milk kefir and that is a given, BUT you can produce more milk kefir without grains starting from milk kefir.
Meaning: once you have strained kefirans you can pour some of that milk kefir into some fresh animal milk and make more milk kefir.
It won’t be the same as using the grains, both in terms of taste and beneficial properties, and the trick will only work for a couple of batches.
In other words, the ability of the grain-less kefir to ferment other milk will be exhausted pretty quickly.
Don’t expect to use kefirans once and have set up an endless kefir production chain, because it just does not work that way.
And there you have it.
Ready to ferment your first jar?


