Fermented Garlic Scapes – Recipes And How To Eat Them
Fermented garlic scapes are delicious and 100% zero waste. Here are two recipes to lacto-ferment scapes plus some great ways to eat them.
If you have never grown garlic ( Allium sativum ) in your veggie garden the chances that you know what a garlic scape is and how it looks like might be very slim.
After all it’s not something you see every day in the fruit and vegetable section of the average supermarket…
I too was in the same position not long ago so I really know how having absolutely zero knowledge feels like.
Then the day came when my partner and I, both serious garlic lovers, decided to give growing it a go and BAM! Garlic scapes!
With me being me, I began researching both the online and offline worlds for ways to preserve them and, obviously, ferment them.
Some time has passed, many experiments were made, and one bright day we mastered our fermented garlic scapes recipe.
The exact recipe that I am going to share with you today.
Or should I say recipeS, as there will be two:
- Whole Fermented Garlic Scapes
- Sliced Fermented Garlic Scapes
But first allow me a few lines to quickly go through what garlic scapes are and how to identify them on a garlic plant.
This way everyone will be on the same page and no one will be left out of the fermentation party.
If you already know this stuff, feel free to jump ahead.
Garlic Scapes – What Are They?
Let me reassure you: garlic scapes are not an obscure, exotic and elusive natural phenomenon.
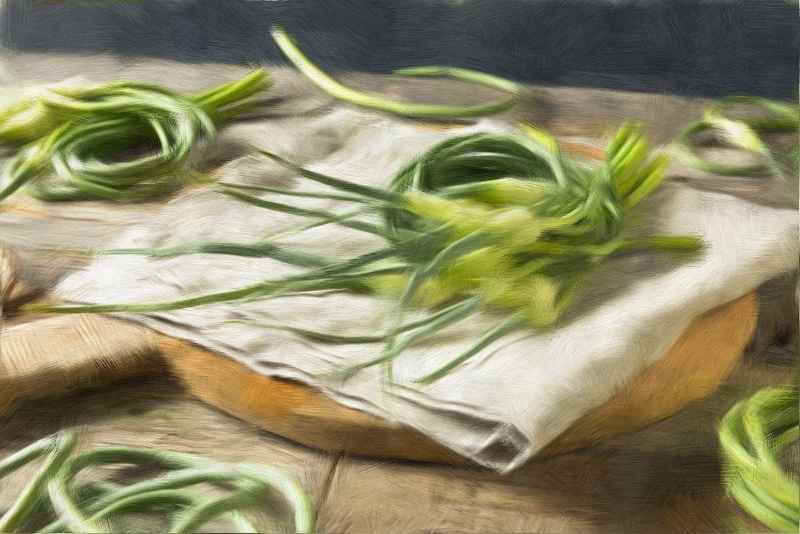
Garlic scapes are the collective name for both the stem and the developing flower bud of the garlic plant.
It’s really that simple.
And it’s as simple to identify them just by looking at the plant.
Firstly, emerging from it, you will see a curly green stem that in time will straighten and then curl up again.
On the very end of this stem sits the flower bud.
You now know what a garlic scape is and how to recognize it.
Easy peasy.
Just a heads up.
Often, when you hear people talk about garlic shoots, garlic stems, garlic tops, garlic stalks or garlic bolts, they actually mean garlic scapes.
RECIPES
Fermented Garlic Scapes – WHOLE
This recipe is given to you without quantities so it can be used with every amount of garlic scapes you intend to ferment.
INGREDIENTS
- whole garlic scapes ( stems and buds )
- salt
- water
- fresh oregano or marjoram
- fresh chillies
STEPS
- Let’s start with preparing the garlic scapes by washing them thoroughly under cold running water and cutting off the hard ends
- Check every single scape for bruises, stains, and anything else that can potentially affect the fermentation process
- Now pat dry them with some paper towel and weigh them
Remember: always use the metric system as it’s more reliable and precise
- Write down the weight on a piece of paper
- Now place the garlic scapes inside every jar in whichever way you prefer.
Some people prefer to ferment them in circles taking advantage of the shape of their jar whilst others like to create knots and ribbons with their scapes.
Some fermies find placing them up right with the bud facing up the best way to proceed.
The choice is entirely yours.
- When all scapes are tightly packed into the jars pour in enough non chlorinated water to completely submerge them.
But always remember to leave enough head space in every single jar without exception.
The level of scapes and water should stop at about 3 cm / 1 inch from the top.
- Now it’s time to prepare our brine which, for garlic scapes, is going to be a 2.5% ( salt/weight of water and scapes )
If you are not confident with the process you can learn everything in our post about making a fermentation brine to ferment every vegetable.
- Add as much oregano and chillies as you like to every jar and pour the brine back in, making sure to fully cover all garlic scapes
- If necessary use a weight to keep them submerged
- Clean rim and collar with a clean cloth and seal the jars
- Let them ferment away from direct sunlight for 14 days at a temperature not higher than 20°C / 68°F
As you know we favour and absolutely recommend using Bormioli Fido as they do both airlocking and burping on their own.
If that’s what you are using your job is pretty much done.
As a precaution place a tray under the jars and come back to check them after two weeks.
If the jars you have are NOT the clip top and gasket type you’ll need to regularly burp them to release CO2 and prevent explosions.
At the 14 day mark, taste the fermented garlic scapes to check if they have reached a degree of fermentation you are happy with.
If tasting resulted in a thumb up it’s time to move them to a cold cellar or inside the refrigerator to slow fermentation down.
If not yet ready instead, let them sit for some more days and taste again.
Sliced Fermented Garlic Scapes
The recipe is almost the carbon copy of the one above but it’s the one we opt for to be as zero waste as possible in our cooking.
In fact it is absolutely perfect to use up all those garlic scapes that aren’t suitable to be fermented whole.
The short ones, the broken ones and those that had much of the stem removed because of bruises and damages.
We just cut them up and nothing get thrown away.
What I am about to share with you is our peppery recipe and it’s the one we like the most but, as always, you are free to add, change and remove any ingredient.
INGREDIENTS
- Garlic scapes
- Water
- Salt
- Black peppercorns
- White peppercorns
- Pink peppercorns
- Fresh basil leaves
- 1 fresh mint leaf per jar
STEPS
- Wash, clean and weigh the garlic scapes like you did for the recipe above
- Place the scapes on a clean chopping board and start cutting them into 3-4 cm ( 1-1.5 inch ) long pieces
- Fill up every jar leaving the right amount of head space then add enough water to completely cover all the sliced scapes
- Pour out the water and proceed to prepare a 2.5% brine exactly as instructed in the recipe above
- Whilst salt is dissolving prepare a pinch of every peppercorn type (black, white, pink) for each jar
- Roughly crack the peppercorns with mortar and pestle or a knife then drop them in every jar
- Add 1 small bunch of fresh basil leaves and 1 mint leaf to every jar
- Pour the brine in, clean rim and collar and seal the jars
- Allow the sliced scapes to ferment at a temperature of 20°C / 68°F or lower for at least 10 days then do a test taste to see if they are ready.
And that’s all.
This is how easy it is to make show stopping garlic scapes that will impress everyone.
For their look first, but ultimately for how delicious they are.
And there is more.
Besides being a “bonus harvest” and a food that is delightful both fresh and fermented food, Garlic scapes are also very good for us.
They can help our well being exactly like garlic does, but with a less pungent taste thanks to which your social life will be left unharmed.
Join Our Community
GOOD TO KNOW
Now, for those of you wanting to grow some garlic with the secondary benefit of harvesting garlic scapes, here is some useful information.
FIRST: Not all garlic plants produce garlic scapes
And this is why it’s very possible for you to have grown garlic for years but to never have seen one teeny tiny scape in the garden.
Don’t scratch you head…it’s not your fault!
Garlic plants are divided into two main categories: softneck and hardneck.
Hardneck plants naturally produce scapes, while softneck, albeit as delicious, do not.
So now we know that we must plant hardneck garlic, but which varieties belong to the hardneck family?
Here are some you could choose from:
- Rocambole Garlic
- Porcelain Garlic
- Purple Stripe Garlic
- Marbled Purple Stripe Garlic
- Glazed Purple Stripe Garlic
- Asiatic Garlic
- Middle Eastern Garlic
- Creole Garlic
- Turban Garlic
If none of these is available in your area just ask your local nursery, they will know how to help you out.
Tell them you would like to grow garlic and to also harvest the scapes; I am sure they will suggest you the varieties best suited for your specific zone.
Be aware that growing hardneck garlic in a very hot climate could present some challenges as they are known to thrive with cold.
If that’s your case I advise you to pick the Asiatic, Creole and Middle Eastern varieties from the list above and start with them.
SECOND: Understanding when to harvest garlic scapes
There is a specific window of time when scapes are at their best to be used in our culinary delicacies.
And it’s useful to know how to determine that because stringy and woody stuff never turns out tasty even after fermenting it.
That’s why we are going for garlic scapes that are bright green and firm but still tender.
And to determine this you and I are taking the easiest path, which is using our eyesight and touch rather than complicated time frames and calculations.
Before turning into little investigators, let me help you out with establishing the best time of the year to pick them.
Knowing that our globe has as many climates and micro climates as there are clouds in the sky, please take these as mere guidelines.
As an indicator, garlic scapes enter our window of interest in late Spring when the plant is strongly growing and bulbs are not ripe.
Which means that scapes are ready long before any dry leaf appears on the plant and even longer before the garlic heads are ready to harvest.
And this is how we know when to pick them.
How long are they? Are they curly?
As mentioned in the first lines of this post, scapes will initially grow in a curl then straighten then curl up again.
It is at this second curl that you want to pick them.
Before picking them make sure they are at least 20-25 cm ( 8-10 inches ) long; if they are shorter you can wait a little longer.
Are they firm?
Feel the stem of the scape between your fingers but be gentle enough to avoid damaging or bruising.
The stem should be firm but also bouncy and flexible.
If it feels woody or a little dry and hollow the garlic scape is past its window and you should leave it where it is.
Soon, from it, a stunning flower will bloom for your deepest enjoyment.
How do the flower buds look like?
As you already know a garlic scape is the sum of the growing stem of a hardneck garlic head and its flower bud.
So far we have looked for clues in the stem, now let’s turn our eyes to the flower.
The bud should be at the first stages of development, have an elongated shape and be tightly closed.
No petals should be visible.
If, on the contrary, you see a very swollen bud close to opening or, worse, already showing some lilac petals, you know what to do.
That’s right.
Leave it behind and enjoy a beautiful flower plus some bonus seeds for next season.
Delicious Ways To Eat Fermented Garlic Scapes
Fermented Scape Pesto
This is one of the easiest and versatile ways to use the garlic scapes you have fermented.
Drop the garlic scapes, some garlic, extra virgin olive oil, pine nuts and some aged cheese in a food processor then let it run until the ingredients have reached a smooth consistency.
Season to taste with some salt and oil and your pesto is ready.
It can be used with pasta, on a slice of freshly baked bread or focaccia and as a sauce that will elevate any meat, burger or fish to another and very welcome level.
Try adding some “dots” of home made shatta sauce or some fermented chillies for extra layering and visual appeal.
Garlic Scape Sauces
Tartare Sauce
Put mayo, a little Dijoune mustard, chopped garlic scapes, fresh dill and parsley, a drizzle of fresh lemon juice and a pinch of salt in a bowl.
Mix everything together with a spoon.
In a matter of minutes you have made a garlic scape tartare sauce that is head and shoulders above anything you can buy from a shop.
Garlic scapes are also IDEAL to make garlic based whips like Spanish aioli or Lebanese Toum.
Garlic Scape Toum
In a blender place a handful of garlic scapes, a teaspoon of salt and the juice of half a lemon than blend until a smooth paste like consistency is reached.
With the blender going add 3 table spoons of EVOO and 1 table spoon of lemon juice.
Keep blending until incorporated and repeat the process of adding 3 more table spoons of EVOO and 1 table spoon of lemon juice
With your blender still running add 2 more table spoons of EVOO and 2 table spoons of ice cold water.
DONE. Enjoy your delicious and fluffy Toum.
How about making a gourmet Danish remoulade instead?
Danish Scape Remoulade
Take a mixing bowl and drop in mayonnaise, strong mustard, some home made sauerkraut, chopped fermented garlic scapes, a little turmeric, finely chopped fresh chives and a pinch of both salt and sugar.
Mix, taste and season if needed.
You will be amazed by how good this sauce taste and, if you are like us, you’ll end up sticking it on everything.
White fish, fine dining burgers ( made right in your kitchen ), fried chicken, falafel, on salads…
Milk Kefir & Garlic Scape Sauce
Drain some whey then pour the thickened milk kefir into a bowl.
Add chopped garlic scapes, your favourite olives finely chopped, a pinch of oregano, a drizzle of extra virgin olive oil and a little pepper.
Toast some bread, add your kefir-scape sauce, finish with extra virgin olive oil and you are ready to go!
Do you have some fresh or fermented tomatoes handy? Chop them and sprinkle them over your kefir-scape bruschetta.
But really, there are so many ways one can use whole and sliced fermented garlic scapes.
For a tasty frittata all you need to do is adding them to the egg mix and for a pizza that tastes like Italy finely chop some scapes and mix them in with the tomato sauce.
Then add some extra on top of your pizza right before serving it.
If Asian food is your vibe then you should definitely use garlic scapes next time you make fried rice or a stir fry.
And soups, pasta sauces, pies, salads, caprese, tuna and salmon salads, panzanella…
Your imagination, when it comes to the possible uses of garlic scapes, is really the limit.
They are so versatile and delicious that you can hardly go wrong.
Just remember this one important thing: all the good microorganisms you spent weeks raising will die with heat.
Keep that in mind when incorporating fermented food in your recipes and try, if you can, to always use some of it raw .
And this is it from us.
Have a nice one.

